
Making ravioli (or raviolis) is a little time consuming, but very easy, and we make a whole bunch at one time so we only have to make them once or twice a year. This recipe will make 500-800+ raviolis, depending on the size of the ravioli pin you are using. My family uses large pins that make small raviolis, but all of our pins differ in the depth of the holes, and that makes a difference in the amount of filling you are able to put in your raviolis. I found a small pin online that makes oblong raviolis that are about 50% larger and has deep holes so I can put in more filling. The down side is that I can only make half as many raviolis in one rolling of the dough. I’m still searching for the perfect pin.
Anyway, I’m afraid I got so involved in the process, I forgot to take many photos. So I’ll post what I have, and the next time I make raviolis, I’ll try to remember to add more pictures. But I probably won’t.
STEP 1: PREPPING THE FILLING
You’ll probably need to place an order for swiss chard with your local grocer, because it’s almost impossible to find enough swiss chard at one place. I order a case, which is 12 bunches. You usually get a discount for buying a case, and it’s only about $14 anyway.
The family recipe calls for 10 bunches of swiss chard. But, I like my filling to be nice and green, so I cut off the really thick white stalks of the swiss chard, and use all 12 bunches. If you’re really thrifty, you can use 10 whole bunches in your filling, then cook and eat the other two bunches for dinner. I don’t like swiss chard, and I’m not worried about the starving children in the world because probably don’t like swiss chard either, so I just throw away the thick white stalks and use the rest of the 12 bunches in my filling. Up to you.
The day before I make raviolis I do a little prep work on the filling. First you have to wash the swiss chard really well because it’s always full of sand. I soak the bunches, then wash each leaf individually under running water because the leaves are curly with lots of places to trap dirt. I hack off the thick white stems then cram as much chard as I can in a pot with some water. It takes two huge pots for me to cook all the swiss chard, then it cooks down to nothing.
Boil the swiss chard until it’s tender, then drain it and let it cool. When it’s cool, grab a fist full and squeeze all the excess water out you can. Don’t be obsessive and try to get all of the water out, because you don’t want it dry as dust, but a few good squeezes per fist full will do it. After it’s all cooked and squeezed, this is all you’ll have left.

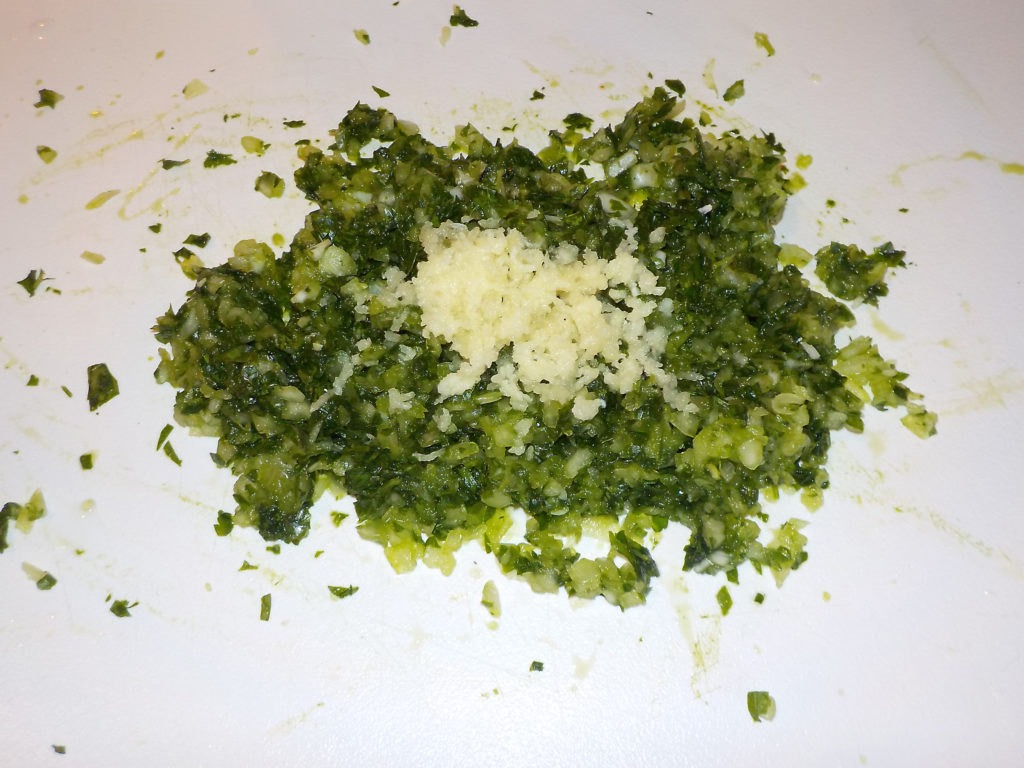
Next I finely chop 1 smallish onion, 1 fist full of parsley (wash, remove big stems, squeeze in paper towels to get out excess moisture), and 4 cloves of garlic.
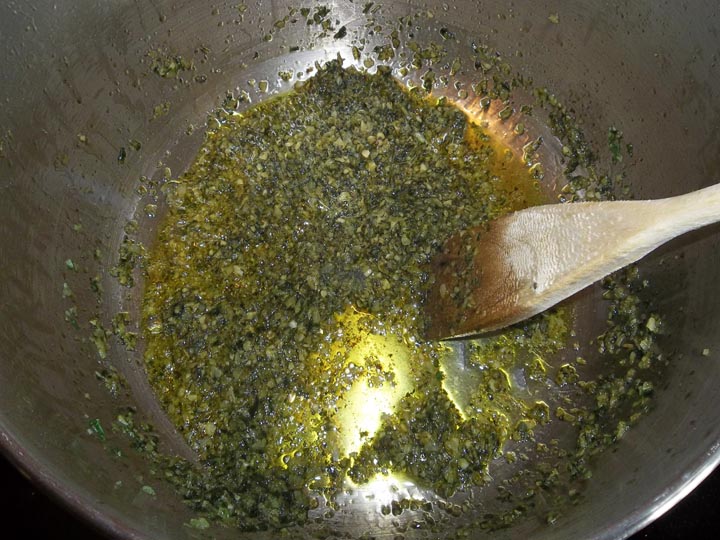
Fry them in a pot/pan coated with a good layer of olive oil until the onions are getting browned, wilted, carmelized.
Add 3 pounds of lean hamburger and continue cooking until the meat is browned. Then I drain off the oil, and stick the hamburger and swiss chard in the fridge until the next day, because I’ve already had all the cooking I want for one day. But you can keep going if you’re a glutton for punishment.
STEP 2: MAKING THE DOUGH
Noni used to make her dough by hand, but why do that when we have food processors? Just dump in 2 cups of flour, two large eggs, and turn it on. While it’s whizzing around, pour in about 2 Tablespoons of olive oil and slowly add just enough water until it cleans the bowl. You’ll probably have some moist pellets lying around, but most of the dough will be in a nice, soft ball, that holds together and isn’t sticky. Stick the dough on your pastry board and turn a bowl over the top of it, or put it in a bowl and cover it, and let it rest. This will relax the dough and make it easier to roll out. If I’m using my pin that makes thick raviolis, I make five batches of dough for the amount of filling I have. For a pin that makes thinner raviolis, it can take up to eight batches of dough. If you have extra dough, you and always turn it into noodles and stick them in the freezer.
STEP 3: MAKING THE FILLING
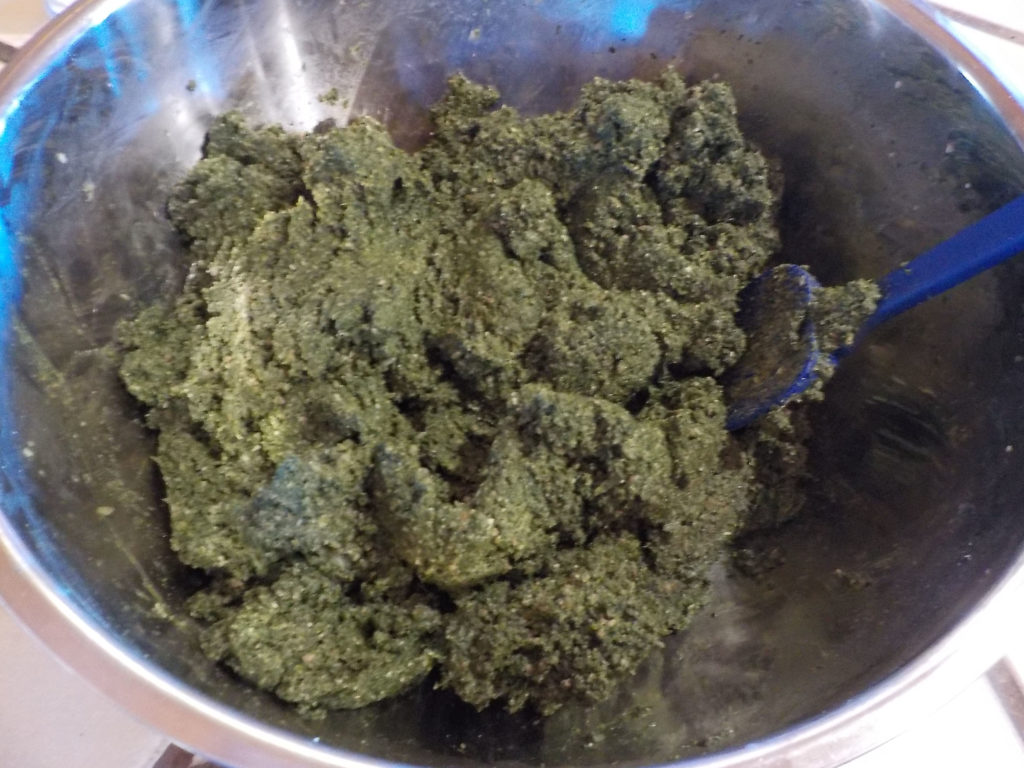
Put about 1/3 of the hamburger mix, and 1/3 of the swiss chard in your food processor at a time, and whiz it around until it’s getting fairly smooth. You don’t want it to be totally pasty. You should still see granules of beef, but no big chunks because they will poke holes in your dough. It should look something like this:
Now you mix in the spices. Start with:
3/4 cup finely grated dry Monterey Jack cheese (Get it from your local deli. Or you can use Parmesan. Just make sure it’s fresh and not the stuff you buy in cans)
1/2 cup fine, dry bread crumbs (I use Italian seasoned crumbs)
3/4 tsp each ground: allspice, black pepper, & cloves
1/2 tsp cayenne pepper
3 tsp salt
Mix that all together, and taste it. I usually end up adding more cheese. My family adds 3/4 tsp cayenne pepper and 3/4 tsp cinnamon to their ravioli filling. My Noni used cinnamon. I think they’re better without it. And I really don’t want to feel the burn of cayenne pepper. But to each his own. After you have the seasonings adjusted to your liking, mix in:
5 large eggs….and you’re done!
STEP 4: MAKING THE RAVIOLIS
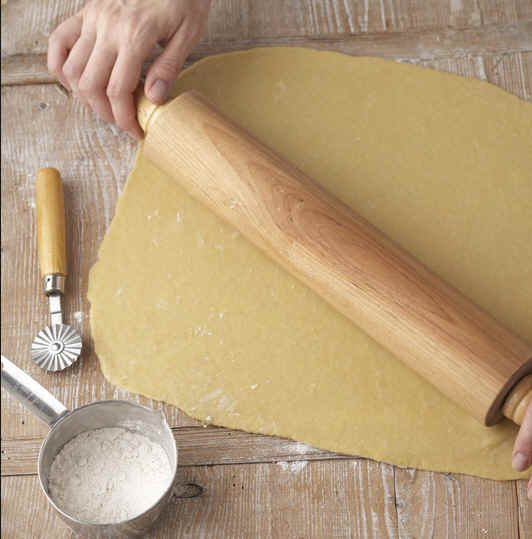
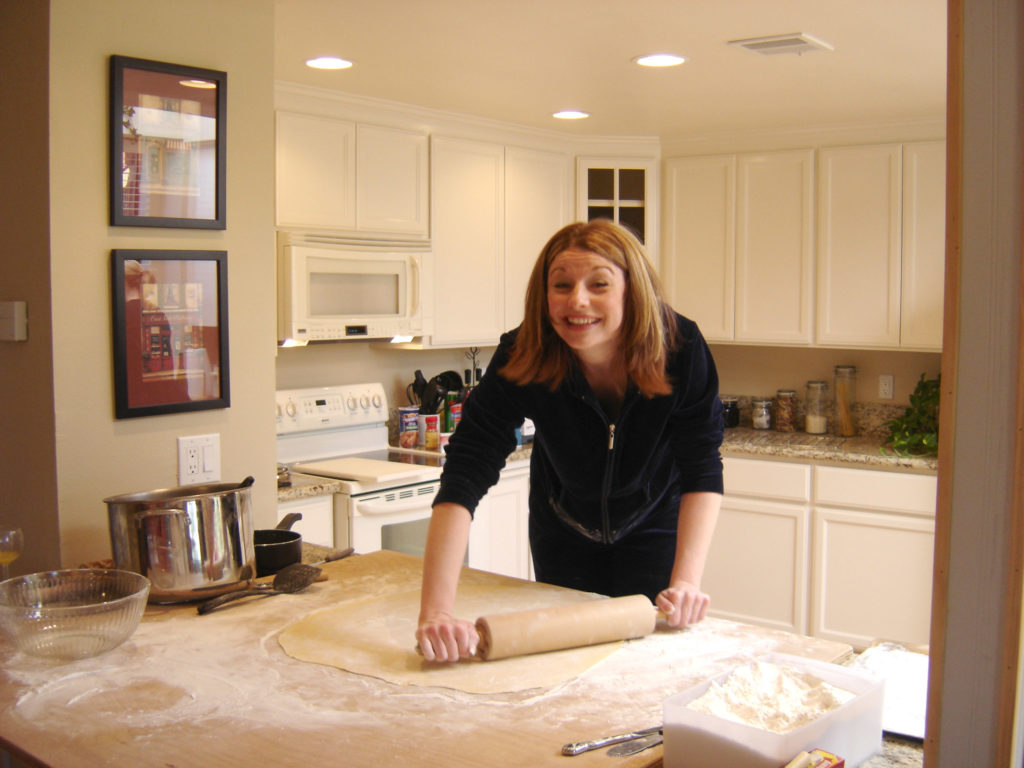
Now comes the fun part. I have a 4′ X 4′ piece of birch plywood I use just to make raviolis. One batch of dough, when rolled out into a circle, will come pretty close to the edges. If I’m using the big pin that makes thin raviolis, I roll the dough out until I can begin to see the grain of the wood. For the pin that makes thicker raviolis with more filling, I leave the dough a little thicker. You should see a greenish tinge from the filling when you make the raviolis, but you don’t want the dough so thin that it will tear.
Here our neighbor Susan is rolling out dough like a pro. This is for my little pin that makes the big, thick raviolis, so we’re only rolling out half a batch of dough at a time, and leaving it a little thicker.
This is cousin Summer, rolling out a big sheet of dough for smaller, thinner raviolis, to be made with our giant pin.
After the dough is rolled out, we fold it in half and crease it slightly, then open it back up. That way we know where the halfway point is. Spread the filling from the crease to within an half inch of the edges, covering half of your circle of dough. I like to use a frosting spreader to spread out the filling, but a dull knife will work also. Then fold the half of the dough with no filling over the top of the half you just spread the filling on, making a little ravioli sandwich.
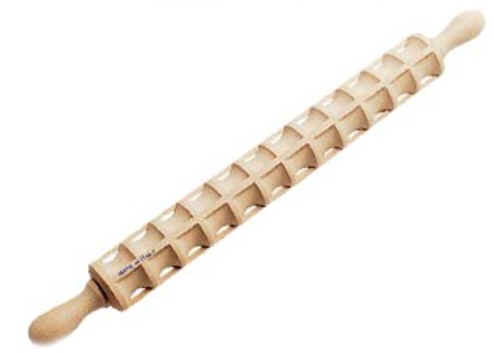
Now you grab your trusty ravioli pin, that looks like some version of this:
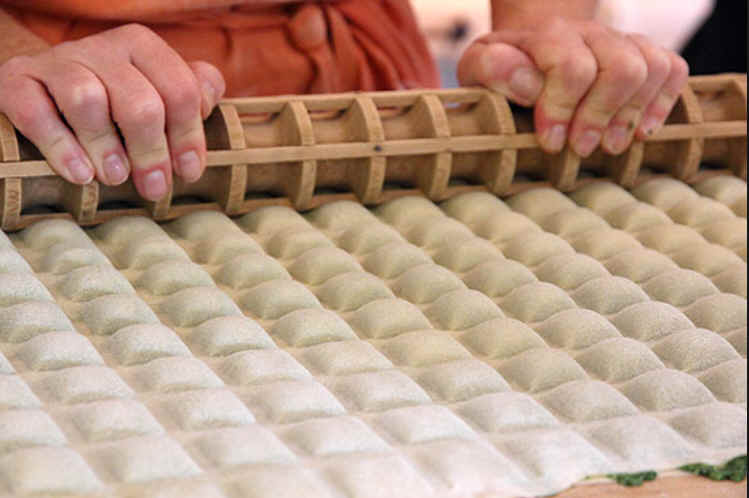
Starting a one end, and using the folded edge as a guide to keep you on the straight and narrow, roll the ravioli pin over the top of your dough. Keep a firm downward pressure as you roll. If you see the dough starting to bunch up in front of the pin, just sort of rotate the pin down a little as you pull it back toward you. It’s like magic.
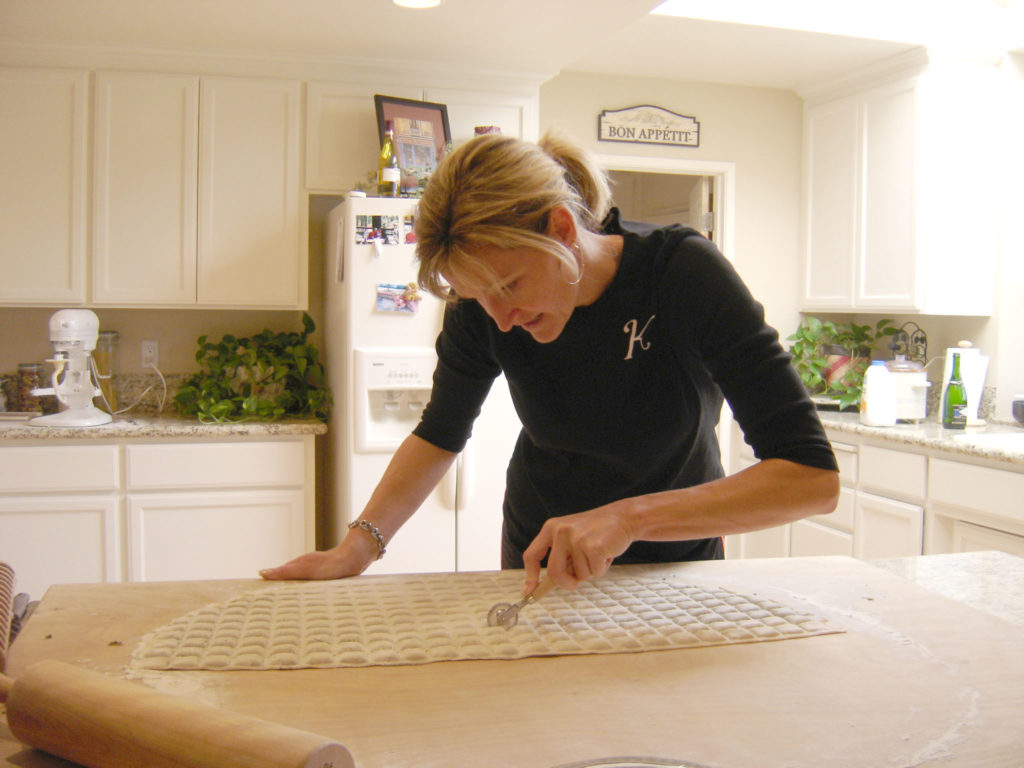
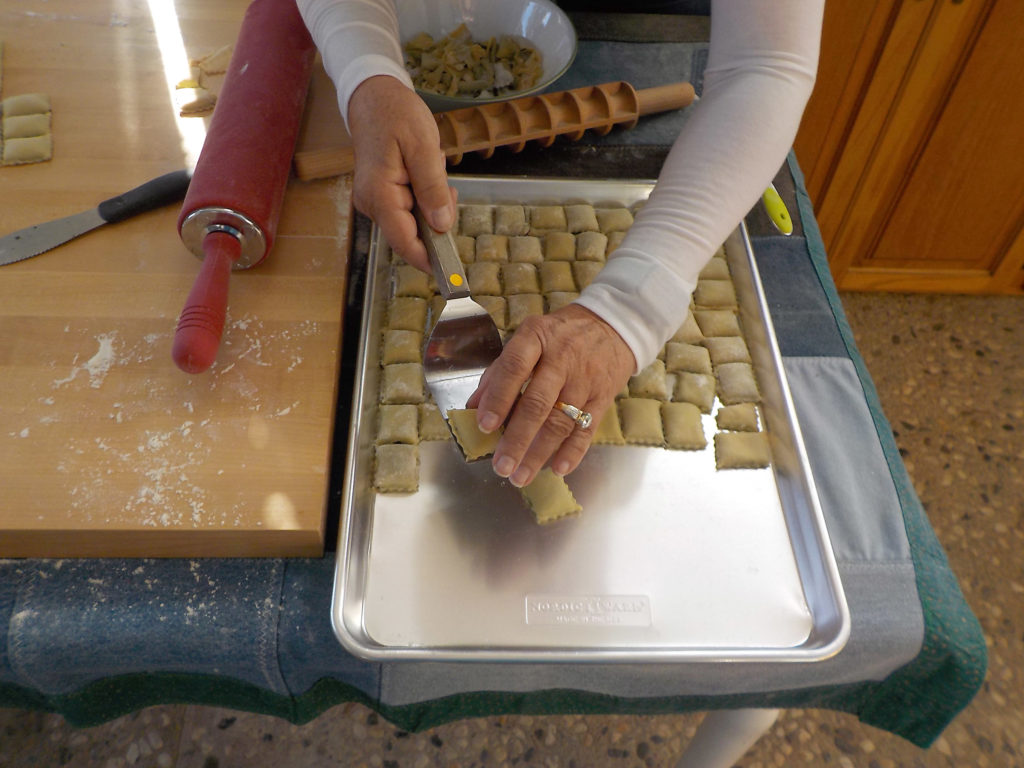
Now we cut the raviolis apart, using a little wheel with a zig zag edge. You just drive that little wheel down each of the roads between the raviolis, trying to go straight down the middle and being careful not to nick any of the little pockets. There will be some waste around the edges, where there are bits of raviolis that aren’t sealed. You can gather all the scraps up and throw them in a pot of minestrone soup. Here’s cousin Kelly cutting some raviolis apart:
Finally, we set the raviolis on jelly roll pans, and stick them in the freezer until they’re hard. I use jelly roll pans because they have edges, so you can stack one tray on top of the other slightly off kilter, in the freezer. When the raviolis are hard, scrape them off the sheet, break them apart, and store in zip lock bags.
Drop the frozen raviolis in boiling water. Stir a bit right as you add them, so they don’t stick to the bottom or each other. Cook until they float, then given them the old taste test to make sure they’re tender and done. Drain em, sauce em, add a little cheese…wait for the rave reviews.